Saturday, February 11, 2012

Applique Wall Hanging


I have finally finished my applique wall hanging! I call it 'The Love Birds'. Just in time for Valentine's Day.


One holds the key to the other's heart.


It's hanging in my kitchen. A little reminder that Spring is on its way.

I found the original idea from the June 2011 issue of Create and Decorate magazine. I love this magazine, as it has so many wonderfully creative projects. You can subscribe or get this back issue from www.createanddecorate.com


Using the original project as inspiration, I chose my fabrics. I used colors that would coordinate with my own kitchen. You can customize your applique in this way. 100% cotton works best for applique. A shirt weight or quilting cotton is easiest to work with. Anything heavy, slippery or synthetic won't be as easy to work with and you don't want a fabric that easily frays.

Wash, dry and press all of your fabric before beginning. You wouldn't want to later wash your lovingly created work and have it bleed or shrink on you!

I chose botanical prints and a soft stripe. I actually used the reverse side of the stripe, as I wanted a soft and muted background. I used the larger botanical motifs as actual elements in my design. (Flowers and some leaves)

Materials

Homespun cotton, approximately 14" x 20" piece (background)

Muslin or coordinating fabric, approximately 14" x 20" piece for backing

Various cotton scraps in blue, greens, creams, brown, and pinks

*Therm O Web Heat 'n Bond Lite Iron-on Adhesive (optional)

Thin Cotton Batting for backing and design elements

Embroidery floss to coordinate ( I used a soft moss green or Khaki)

Lock and Key charms or similar

11 x 17 " pad of vellum for making pattern

**4  1" buttons and 1x16" thin nails to fit through button holes,  or 20" thin dowel and cord for hanging

Sewing supplies, pencil, ruler


I began by drawing my design on a large sheet of vellum. This vellum was also used as the dimensions of my wall hanging, 11x17". (Minus the 'frame') That is an easy way to size your project. The vellum came in a large notepad. I found it in the art section of my local craft store.

Simple designs and shapes work best. Think 'children's coloring book'. In fact, coloring books are excellent sources of design ideas.


You can see that I have used the pad of vellum to cut out my background fabric. I simply used a pencil and traced around.


For the pattern pieces, leave the original design intact and use another sheet of vellum to trace over the pattern elements you need to cut out. Vellum is sturdy enough to use for the pattern pieces.

 I save all of my design elements to re-use in a large envelope with a picture of the finished project on the front and directions written down on a sheet of paper. That way if it comes out nicely, I can re-make it as a gift for someone.
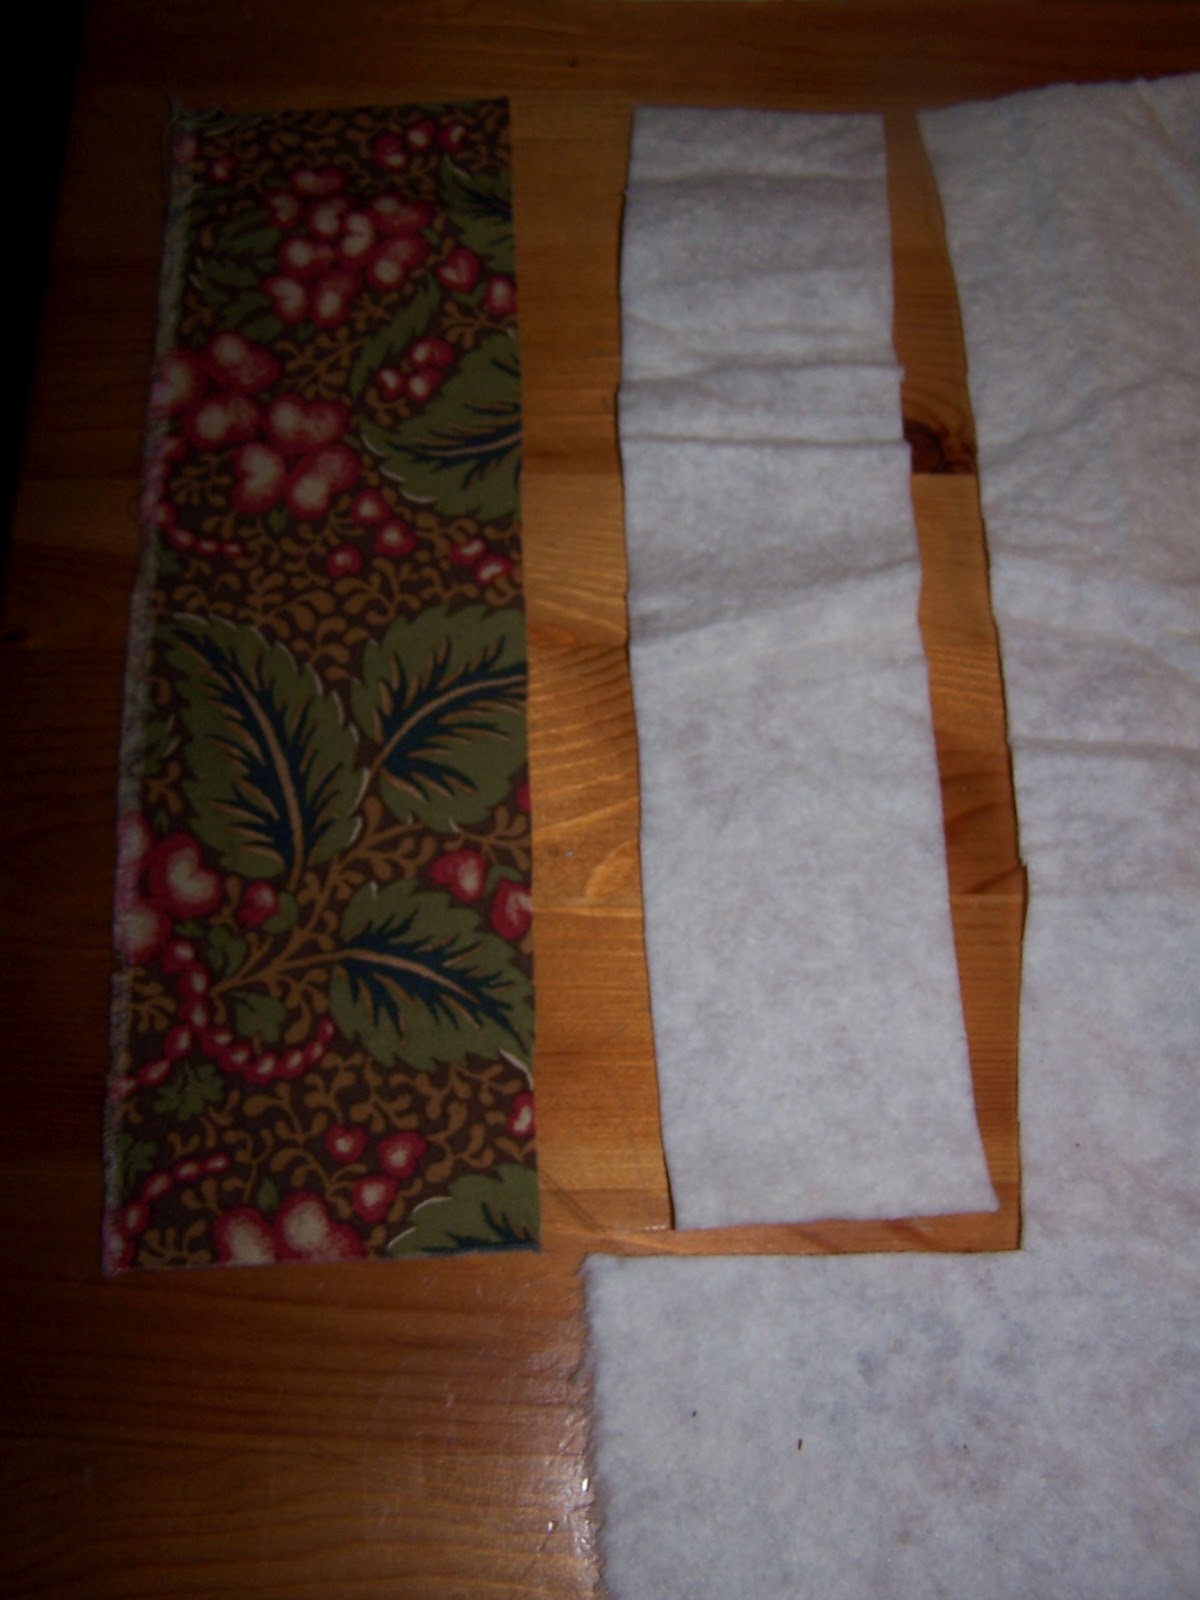


To begin the first design element, cut a strip 2-1/2" wide by the length of your background fabric. To simulate a 'tree' I used a botanical fabric with large leaves and berries with a brown background. Using this strip as a pattern, cut out a piece of thin cotton batting the same size. Trim 1/4 inch off each side, and place under fabric and press edges under.


Hand sew to background fabric, approximately 2-1/2" from the left edge, using two strands of embroidery floss in a coordinating hue. ( All floss separates into 'strands'. Cut off the length you need and then separate the strands according to how much thickness you desire to work with.) I have used a soft muted moss green. You can use whatever color strikes your fancy. I used a simple overcast stitch to apply all of the applique pieces. Wherever you buy your embroidery floss (craft store, needlework shop, fabric store), they usually have small booklets of basic embroidery stitches to learn from.

*At this point I am going to tell you that if you don't want to use the traditional technique of pressing all the edges under for each design element, you can use a product called 'Therm O Web Heat n' Bond Lite Iron-on Adhesive, or a similar iron-on bonding product. You just iron it onto the back of your fabric before cutting out your design pieces, then after placing on background fabric, remove paper covering and iron again to fuse in place. Then you can hand stitch around the edges. This eliminates the fuss of having to fold over and iron each little piece.

But I used the traditional applique technique and folded over the fabric edges. To do this, you need to cut out each little piece with an extra bit of fabric to fold over, then clip into the seam allowance around any curves to prevent puckering. I use a spray bottle with water to dampen the cloth when I iron. This helps hold the shape. You can also use your needle tip once you start sewing the piece in place to coax the edges under and into shape as you sew. You will quickly get a feel for this as you go.


I placed the flower pattern pieces directly on a flower motif of the fabric. This gives your work added dimension. Simply draw around the pattern piece of vellum with a pencil. Remember to add an extra 1/8 to 1/4" 'turn under' allowance when you cut out your design elements if you choose not to use the heat n' bond.

A very easy way to get curved pieces to fold over nicely is to hand baste around the edges where you press under. Clip into the fabric not quite to the stitching line at regular intervals of about 1/4 " especially where curves meet, after basting. This prevents puckering. When you press the fabric edges under, they will nicely hold their shape. I don't know why this works, but it does! An extra step, but worth the effort. Just use a seam ripper to carefully remove any basting stitches that show once you sew it in place.

Remember, you are creating a possible heirloom, so take your time and do it right.


This is my 'work station'. It is a softly padded lap 'desk' with an attached LED lamp (powered by batteries) and a cup holder which I use for threads and supplies and a pencil holder. I don't need an embroidery hoop for the applique, as I find just holding the project flat on a table or this little lap desk works just fine. This way I can work in the evenings while enjoying the company of Hubby and 'watching' my favorite TV shows. (I did use a small embroidery hoop for creating the bird's french knot eyes and satin stitch legs)

If you use a table, remember to place a piece of cardboard or some other hard surface barrier between your work and the table, as your needles and pins will mar its surface.


Layer your design from the background up, starting with the branches, the bird's bodies, leaves and finally the flowers and wings. I used opposite sides of the same fabric for the leaves, and also used two leaf motifs cut out from the 'tree' fabric. The bird's wings were padded with batting the same as the 'tree'.

Stitch everything in place using two strands of floss and an overcast stitch.

I added the leaf veins and stems, flower details, bird legs, wing details, and bird's eyes using simple embroidery stitches of satin stitch, back stitch and french knot. I used a black embroidery thread for the bird's french knot eyes.

I then added a dark striped fabric 'frame' by first cutting 2 " strips of fabric to measure the same length of the finished applique. I sewed the side strips on the applique first, using a sewing machine, with a 1/4" seam allowance (right sides together), pressing flat. Then I measured, cut out and sewed the top and bottom strips the same way. I hand stitched around the inside edge of my 'frame' using the same overcast stitch as the rest of the design.


Next, I cut out a slightly larger piece of thin cotton batting and pinned this under the applique. I gave it a nice hot pressing to flatten everything out, then I hand basted the edges neatly, slightly deeper than the 1/4 " seam allowance. This will serve as a guide once I sew the backing fabric on, so make sure this basting is straight and even. This holds the batting in place while you do your final work which is quilting the layers together.

At this point you can now trim the excess batting all along the edges.


For the quilting, I simply used the same two strands of embroidery thread, and used a simple running stitch 1/16 from the edges of all the leaves, making sure to go through both layers of fabric and batting. This will hold all the layers nicely together and give your wall hanging stability and prevent sagging.

The last thing I sewed in place were the little charms for the birds.


I used 4 strands of floss for this. I wanted it to be extra sturdy to hold the charms in place. I found the charms in the bead section of my local craft store. There are many styles to choose from.

I sewed a 'necklace' around the neck of the bird with the heart locket using a 'stem' stitch and 4 strands of floss.

Once you are done with all of your embroidery and quilting, it's time to sew the backing on. I used the same fabric as the 'frame' and simply used the finished project as my pattern to cut it out. Alternately, you can just use a plain piece of muslin for the backing. Keeping the fabric and the applique face to face, (inside out) pin all around the edges except for a 6" gap on one side. This will be your opening for turning everything right side out.

(Decide if you are going to use buttons, a frame, or a dowel for framing before completing this step - **see below)

Start sewing around the edges right along the inside of the basting stitches, starting from the edge of your 6"opening gap. Continue sewing all around until you get to the other side of the gap.

Turn the work 'right side out' through the gap. Press the applique flat, making sure the corners are neat. Press the seam allowance inside the gap. Pin the gap in place. Hand stitch closed.


**To hang my applique, I sewed buttons to the top to use as 'hangers'. You could alternately choose to insert a thin dowel at the top to attach a hanger. You would want to leave two small gaps on either end of the top to insert the dowel when you stitch the backing on. Let the dowel stick out a little on each end and attach a ribbon, wire, or cord for hanging.

Or, you can frame your work in an actual frame by leaving off the fabric 'frame' and simply finishing it off with the backing and inserting it into a wooden frame without the glass.


To use buttons, choose 1" or larger buttons with holes large enough for thin nails to go through. I used 1x 16 "  'wire' nails with flat heads to keep the buttons from sliding off the nail after hanging. These are very thin nails slightly larger than the width of tacks.

I sewed the buttons on by using the bottom most hole and looping the thread around the bottom of the button and tacking in place 2 or 3 times with the uppermost hole extending above the applique edge for the nail.


I carefully spaced them evenly across the top by measuring the outermost buttons 2" in from the edge and the center ones 2 " from the center.

So there you have it, my tips and tricks for creating your very own applique wall hanging. There is no limit to how you can use your imagination with applique. Not only can you make wall hangings, table runners, place mats, and pillows, but you can use this craft for decorating clothing, purses, and even cloth shoes. Combined with embroidery, and your own selection of fabrics, you can create your very own customized works of art.

I hope this inspires you to try this easy and creative craft.


Wednesday, February 8, 2012

Lemons


Sometimes life just throws you lemons. So what do you do? Make Lemonade of course! Do you like my apron? A very Dear Blogger friend Christine, from Scotland (you can read her wonderful blog, 'Writing from Scotland' by scrolling down my blog list) read about our terrible ice storm and the immense clean up and she sent me this fabulous apron to cheer me up. It is a 'Gillian Kyle' design, using organic fabrics and inks. She has a website www.gilliankyle.com.

Christine knew I was trying to make lemonade and she sent this perfect little gift to cheer me on.  Christine knows a thing or two about making lemonade, as she has been given some lemons recently, also. That she has taken time to think of me while she herself is dealing with so much, speaks volumes about what a kind, sweet person she is.

Thank you, Christine.


Life is not always a bowl of cherries. Sometimes your spirit can sink very low. You can be riding along just fine, enjoying the view, and then you hit that proverbial bump in the road. It can really knock you down.

But you just have to keep going. Stopping for a while to refuel. To make some minor repairs. Then you have to jump on that bandwagon again.


And maybe instead of a bowl of cherries, you end up with a chair of bowlies. But that's o.k. A chair of bowlies might be just what you need. Maybe life doesn't always work out perfectly, but you can still make it a perfect life.


Even if all you see are gray skies. You have the power to turn those dark clouds into silver linings. All it takes is a little resolve. A little pep talk. And maybe first you need to rest, to sort things out, to gather all of your lemons and put them in order.


Surround yourself with cheerful faces. Even if that means buying them from the flower shop. Make yourself happy.


Thinking of others can do the trick. No matter how bad you think you have it, there is always someone out there that has it worse. And although you don't want to see other's suffer, you can use that knowledge to step outside of your own problems. Feed the birds, donate to the food bank, encourage a child, visit the sick. Your problems don't seem so bad any more.

Buy yourself a little gift. Here I have combined two - a gift for myself, and a gift for my little hummingbird friends. Don't you just love the 'antique' bottle? I couldn't resist.

Simple pleasures can add up to happiness. It's all in how you look at life. Only you know what will make you happy. Take tiny steps and head that way. Soon you will be rolling along, seeking out happiness at every turn.

And turning that bowl full of lemons into sweet, sweet lemonade.


Tuesday, February 7, 2012

Spring Fever


Just thought I would say hello! I thought you might like some roses. Aren't they so pretty?


Speaking of beautiful.... These little charmers are not waiting for Spring. I have such Spring Fever that I have taken all of the snowy pictures away and exchanged them for Springtime scenes. I'm tired of Winter. Just a few more weeks.......


Soon this little sweetie will be building her nest. The air will be full of song. I'm looking forward to that.


  The potted Hyacinth is filling the kitchen with it's beautiful scent. My applique' hearts table runner is ready for Valentine's Day.


The sun has been shining bright this week through the stained glass window.


Reminding me that Spring is just a rainbow away.

Do you have Spring Fever, too?


Friday, February 3, 2012

Signs of Spring


Look what I found blooming today! One little dandelion poking it's head up out of the dry leaves. It's been warm and sunny every day this week and I have been going outside.

(Before)
To face this. As far as the eye can see. Tree limbs and fallen trees. But I am putting on my blinders and tackling one small area at a time.

(After)
Trying my best to put some order into a landscape of total chaos.


Making neat piles. We are going to rent a chipper and turn them all into mulch. Nothing goes to waste.


Anything too big for the chipper gets turned into firewood. Hubby loves to fire up his chain saw. Now he has a good excuse.


This is the front page of The News Tribune today. I guess we are not alone. Our recent ice storm caused a lot of damage.

It is hard work and I am feeling it. But I wanted to get in shape this year. Be careful what you wish for!


Look at what else is coming up! Daffodils! This was the first place I cleared because I knew my early Daffy's would be blooming soon.

Something to look forward to!


I lost a big section of my plum tree. But I gathered up some of the branches to bring inside. They have just started blooming. A small consolation.


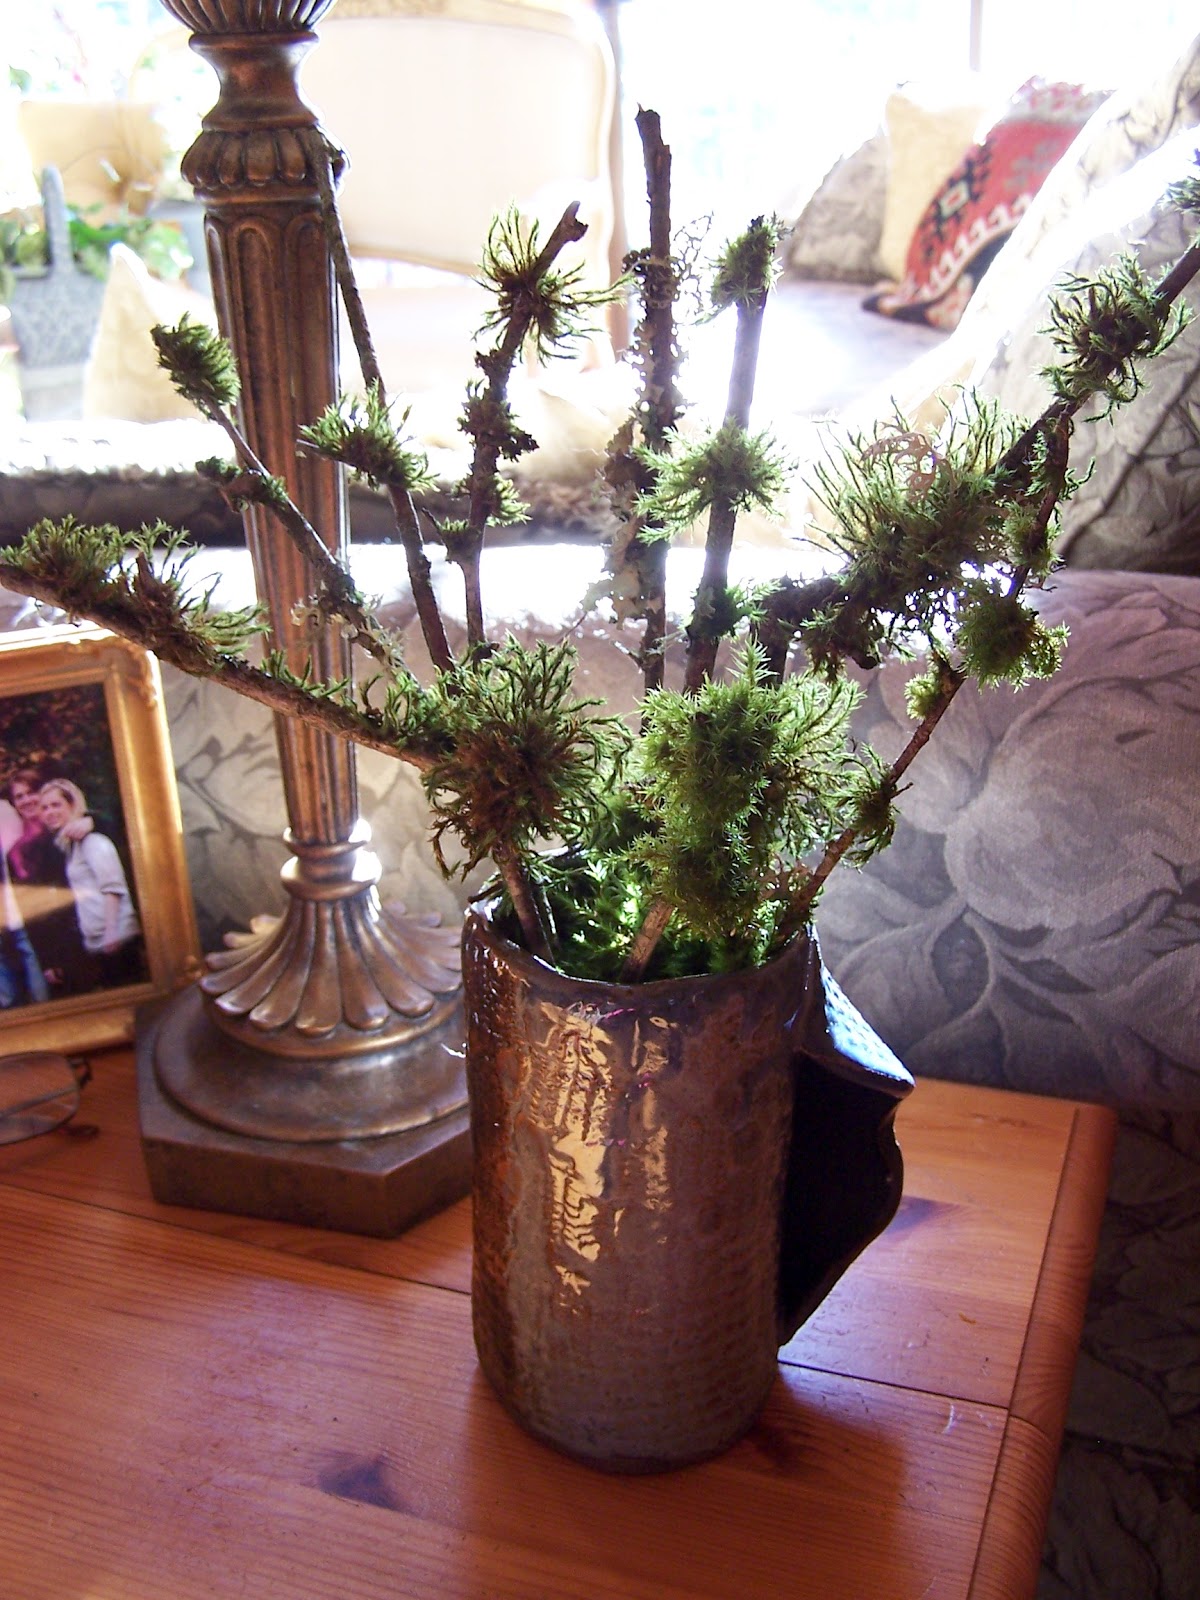
I also found these moss covered twigs and put them in my rustic handmade pottery vase. It's really a coffee cup that my sweet sister-in-law sent out from New Hampshire for Hubby. You put your hand in the open flap to keep warm. I borrowed it from Hubby. I don't think he will mind.


Here's a better view. The twigs came off another plum tree, one I have had since my children were very small. Part of it broke, too. I try not to think of all the damage. I am trying to look forward.

I bring things in to cheer me up. To cozy up the nest. Remember the terra cotta planters I painted before Christmas? I brought in some pine cones for them. The big one is from my 'Monkey Puzzle Tree'. Don't ask me the Latin name, I couldn't tell you. All I know is that it comes from Chili. And it is an ancient form of evergreen. It's completely covered in spines. So I planted it next to my Holly tree.

The heart shaped rock is from Hubby.

After my work out every day, I have been sewing my applique' wall hanging in the evening. Here is a peek. I am almost done.


I promise to show you as soon as I am finished. With a tutorial.

I hope you have a wonderful weekend! Spring is just around the corner! What are you working on?


Thursday, February 2, 2012

My Vintage Style Kitchen - Memories


When I was a little girl, 'coffee klatches' were the main form of socializing for my Mom's generation. Mom always had one of her neighbor friends, sisters, or one of her two best friends, Helen or Janet over for coffee at least once a week.

She would get us off to school, tidy up the kitchen, and bake a coffee cake. I remember her coffee percolator. It was electric, with a thick, black, cloth covered cord, shiny chrome metal, with a little glass nob on top where the coffee could be seen 'perking'. When it stopped perking up through the little glass knob, it would be done. I loved to watch it perk.


Mom's coffee cakes were divine. Moist, sweet, but not too sweet, with a cinnamon crumb topping.

Sometimes her coffee klatches lasted until I got home from school and I was invited to sit and chat with the ladies. They always had the most interesting conversations. Books they were reading, politics, husbands, a little gossip, fashion, current events.

There was usually a couple of pre-schoolers playing nearby or a baby in a carriage, 'sunning' on the porch. In those days, babies were put outside in net covered carriages for fresh air and a little sunshine.  I guess those were the days before Vitamin D was fortified in foods.


Mom would cut me a big slice of coffee cake and make me a cup of 'coffee milk'. She would pour a little bit of coffee in a cup, add some sugar, and fill the rest with milk. I felt so grown up. But soon, the conversation would turn to grown-up matters and the baby would start to fuss, so I was sent away for baby-sitting duty.

I was the eldest girl of 5. I learned very young how to run a house-hold, how to care for my younger siblings and cousins. I was also one of the eldest grand-daughters. There were many aunts and uncles and I was the prime baby-sitter for all of them and for the neighborhood. My earnings helped out at home.

But those precious times when I was allowed to join the 'ladies' at the coffee klatch made me feel so grown-up.


Those days are long gone. The ladies are all at work during the day now. Nobody has time to linger over coffee and cake all morning.


And that's a good thing. Women have control over their own lives now. But back then, they were dependent upon their husbands. And some of those husbands were not very nice. There was actually a 'rule of thumb' on the books. It meant that a husband could beat his wife or child as long as the stick was no bigger than his thumb. I am not kidding. Society frowned upon divorce and there was a lot of stigma with being a "divorcee' ". Other women shunned them. They wouldn't allow their children to play with 'children from a broken home'. It all seems so silly now. But it was reality back then. I am talking about the late 50's and early 60's.  

My Mother was very fortunate. She had a loving husband who's main goal in life was to make his wife and children happy.


Back then, men ruled the world. Women only worked in certain professions and many of them only until they had children. Teacher's, Nurses, and Secretaries. Anyone who is a fan of the television series, 'Mad Men', will get an accurate depiction of how women were treated in the work place and at home.

Of course there were always exceptions. But they were not the rule.


The world was rapidly changing as I grew older and became a teenager. 'Woman's Lib' was just beginning.


But they were still teaching Home Economics in High School. There was a club called "The Future Homemakers of America".

I took full credit classes in sewing and cooking. An hour each, 5 days a week. For two years. All of my life I was training to be a proud 'Homemaker'.

But what I really wanted to be was a Veterinarian. I secretly wished it more than anything else on earth. I took college prep classes besides my 'Home Ec' classes, just in case my secret wish came true.
Alas, it was not meant to be.


That window of opportunity was not opened for me. My parents didn't believe in educating a daughter. They felt that it would just go to waste. That they would educate me and then I would end up getting married and having children and waste my education.

Women's Lib came too late for me.

But I absolutely have no regrets.

I married a wonderful man. I have had a fulfilling life with many adventures. I dearly love my family.

But I raised my children differently. I wanted them to understand how important it was to follow their dreams. Especially my daughters.

And they have.


And for that I am happy. I was fortunate to be able to stay home with my children. Not many women have that opportunity these days. But the good news is, women have choices today. They have control over their destiny.

I could have gone to college, after I was married. It was my choice to stay home with my children. Hubby would have supported whatever I wanted to do. But practicality ruled my choices. Child care was not an option on our limited budget.

And it worked out the way it was supposed to. I made the absolute best of my situation. I enjoyed my life as a wife and mother.   

But I did get to go to night school, once my children grew up. I took computer classes.

You are never too old to learn.

What have you learned today?  
Related Posts Plugin for WordPress, Blogger...